

Table of Contents
- Why Model Railway Track Gets Dirty (and What It Does to Your Trains)
- What You'll Need Before You Start Cleaning HO Track
- The Safe Track Cleaning Process, Step by Step
- How to Clean Locomotive Wheels (and Why It Keeps Track Cleaner)
- Cleaning Fluids and Track Cleaners: What's Safe to Use
- A Simple Model Railway Maintenance Schedule
- What Not to Use on Model Railway Track
- Troubleshooting Track That Still Causes Stalling
- Frequently Asked Questions
Last Updated: September 30, 2026
Why Model Railway Track Gets Dirty (and What It Does to Your Trains)
Learning how to clean model railway track safely starts with understanding why it gets dirty in the first place. Dirty track is almost always the culprit when modellers' trains start stalling.

Track grime comes from several sources:
- Dust settles on the railhead between running sessions
- Oxidation builds a thin film on the nickel silver surface
- Oil migrates from locomotive gears and bearings onto the rails
- Smoke fluid leaves an invisible residue behind
- Scenery materials shed fine particles onto the track
- Wheel residue deposits grime with every lap
The symptoms are easy to spot once you know them. Locomotives hesitate at slow speed. Lights flicker. Sound cuts in and out. Trains stall on points. DCC layouts become unreliable because the decoder loses its signal.
The fix is simple, but it needs to be done the right way. Below, we'll show you exactly how to clean model railway track without damaging rails, plastic sleepers or delicate details.
What You'll Need Before You Start Cleaning HO Track
Gather your gear before you touch the layout. Cleaning HO track with the wrong tools causes more harm than leaving it dirty.
Here's a basic kit:
- A model railway track-cleaning rubber for the railhead
- Lint-free cloths for wiping residue
- Isopropyl alcohol for stubborn film
- A small soft brush for points and frogs
- Long-handled tools or a cleaning wagon for tunnels
- A wheel-cleaning cradle or cloth for locomotive wheels
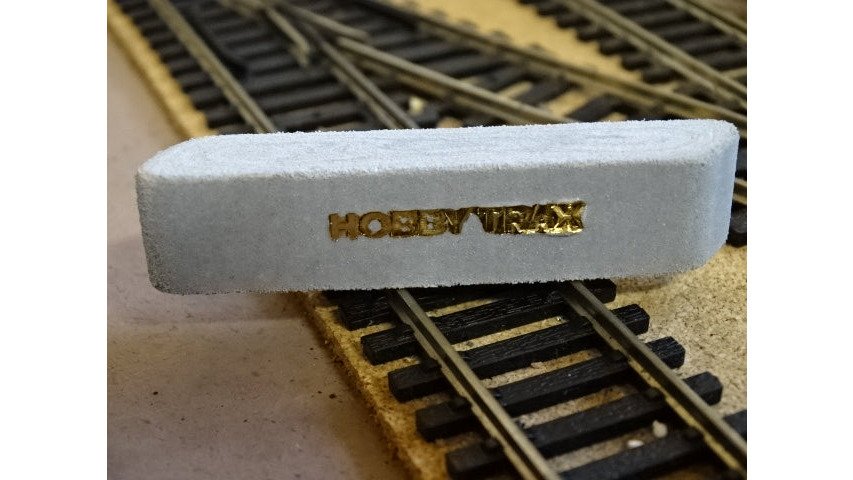
We stock a Hobby Trax Track Cleaning Rubber that suits all gauges and track types. It removes dirt and oxidation without scratching the rail surface.
You'll also want good lighting and a magnifier if your eyesight needs a hand. A small torch helps you spot grime in tunnels and under overhangs.
The Safe Track Cleaning Process, Step by Step
Follow these steps in order. Each one builds on the last, and skipping steps usually means dirt comes straight back.
Step 1: Remove Loose Debris
Start with a dry soft brush or a vacuum on low suction. Work along the rails and sleepers to lift dust, scenery fibres and loose ballast.
Never scrub hard at this stage. You're just clearing the surface so the next step works properly.
Step 2: Clean the Railhead With Light Pressure
Take your model railway track-cleaning rubber and run it along the top of each rail. Use light pressure, just enough to feel the rubber grip.
Work in one direction, then wipe the rail with a lint-free cloth. The cloth lifts the black residue the rubber loosens.
Repeat on both rails. Don't press down hard, because excess pressure can bend rail joiners or shift track.
Step 3: Clean Points, Powered Frogs and Awkward Spots
Points and powered frogs collect the worst grime because they sit lower and trap debris. Use a small brush and a cloth wrapped around a thin stick.
Clean the switch rails gently. Never force anything into the gap between the point blade and stock rail.
For tunnels and hidden sections, a cleaning wagon dragged behind a locomotive does the work for you. Long-handled tools reach spots your fingers can't.
Step 4: Clean Locomotive and Rolling-Stock Wheels, Then Test
Dirty wheels re-contaminate clean track within a lap or two. Wipe each wheel with a cloth dampened with isopropyl alcohol, or use a wheel-cleaning cradle.
Once wheels are clean, run a test locomotive at slow speed. Watch for hesitation on points and listen for sound dropouts.
How to Clean Locomotive Wheels (and Why It Keeps Track Cleaner)
Cleaning locomotive wheels is the step most modellers skip, and it's the reason their track gets dirty again so quickly. Every wheel carries a thin film of oil and dust. When that wheel rolls, it transfers the film straight onto the railhead.
Hobby Trax Track Cleaning Rubber – All →
Here's a safe method:
- Hold the locomotive upside down in a foam cradle
- Apply power briefly so the wheels spin slowly
- Press a cloth dampened with isopropyl alcohol against each wheel
- Let the wheel turn a few seconds, then stop
- Repeat until the cloth comes away clean
For rolling stock, wipe each wheel by hand. It takes a few minutes per wagon, but the payoff is a layout that runs smoothly for weeks.
Many modellers find that cleaning wheels and track together doubles the time between full cleans.
Cleaning Fluids and Track Cleaners: What's Safe to Use
Stick to fluids the manufacturer approves, or use isopropyl alcohol. Both work well, but each has rules.
Isopropyl alcohol dissolves oil and oxidation film. Use it on a cloth, never poured directly onto the track. Keep the room ventilated, because the fumes are strong. It's flammable, so keep it away from heat and sparks.
Manufacturer-approved track cleaners are formulated for model railways. Follow the label, and test on a hidden section first to check plastic compatibility.
Some cleaners leave a protective film. That can help, but a thick film attracts dust. A light application beats a heavy one.
Always test any new fluid on a scrap piece of track before using it on your layout.
A Simple Model Railway Maintenance Schedule
A model railway maintenance schedule saves you from emergency cleaning sessions. Little and often beats a big clean once a year.
Task |
How Often |
Time Needed |
|---|---|---|
Dust rails with soft brush |
Weekly |
2 minutes |
Wipe railhead with cloth |
Fortnightly |
5 minutes |
Clean with track rubber |
Monthly |
15 minutes |
Clean locomotive wheels |
Monthly |
10 minutes |
Full clean including points |
Every 3 months |
30 minutes |
What Not to Use on Model Railway Track
Some commonly suggested methods cause real damage. Here's what to avoid and why.
- Coarse sandpaper: scratches the railhead and leaves grit behind
- Steel wool: sheds fine metal fibres that cause short circuits and rust
- Acetone: melts plastic sleepers and damages paint
- Household oils: attract dust and gum up over time
- WD-40: leaves an oily film that traps grime and harms traction
- Excessive force: bends rail, loosens joiners and damages points
- Residue-leaving products: build up a sticky layer that collects dust
Troubleshooting Track That Still Causes Stalling
If trains still stall after cleaning, work through this checklist:
- Check wheel cleanliness on every locomotive and wagon
- Inspect rail joiners for looseness or corrosion
- Test power feed to isolated sections
- Look for track pins sitting proud of the railhead
- Check point blades for poor contact
- Verify that back-to-back wheel settings are correct
Frequently Asked Questions
What is the best way to clean model railway track?
Start by removing loose dust with a soft brush or vacuum, then wipe the railhead with a track-cleaning rubber using light pressure. Follow with a lint-free cloth to remove residue. For stubborn grime, use a small amount of manufacturer-approved cleaner on the cloth, never poured directly onto the track. Finish by cleaning locomotive wheels so dirt isn't immediately redeposited. Regular light cleaning beats occasional heavy scrubbing every time.
Can I use isopropyl alcohol on model train tracks?
Isopropyl alcohol works well for removing oils and residue, but use it sparingly on a lint-free cloth rather than pouring it on the track. Work in a ventilated area because it is flammable, and keep it away from plastic sleepers where prolonged contact can cause damage. Always test on a small hidden section first. Some modellers prefer dedicated track cleaners because they are formulated for model railway use and are gentler on plastics.
How often should I clean my model railway track?
It depends on your environment and how often you run trains. In a dust-prone room or garage, a quick wipe before each running session helps. A light clean every few weeks keeps things reliable for most layouts, with a deeper clean every few months. If you notice hesitation, flickering lights or stalling, that's your cue to clean rather than waiting for a set schedule. Clean wheels extend the time between track cleans.
Is it safe to use sandpaper on model railway track?
No. Coarse sandpaper and steel wool scratch the rail surface and leave behind metal particles that attract more dirt and can cause short circuits. They also wear through the thin plating on nickel-silver rail over time. A model railway track-cleaning rubber is designed for the job and removes oxidation without damaging the rail. If you need something more aggressive, a fine abrasive block made for model railways is a safer choice than household sandpaper.
Keeping your track clean is one of the simplest habits in this hobby, and it pays off every time you run a train. If you're ready to build a proper cleaning kit, explore our track cleaning rubber, tools and maintenance gear, and DCC components. Get started with HobbyTrax and keep your layout running smoothly for years to come.