

Last Updated: 15 November 2026
Quick Summary
Painting miniature models is the step that unites scenery, structures, figures and track into one believable scene, so always mask railheads, wheel-contact surfaces and decoder or wiring connections before any paint goes near the track. Paint on a railhead or wheel contact will stop a locomotive picking up power, and it is easy to miss until the model fails on the track.
- Work in three thin layers: a subdued base colour, a darker wash in the recesses, then dry-brushed highlights.
- Use a 0 brush for straps, boots and rope coils, 00 for faces and fittings, and 000 for the finest highlights.
- A 2.5cm flat brush covers large terrain sections, blends colours and dry-brushes broad areas quickly.
- Keep a separate clean, dry 2.5cm brush to sweep and shape loose ballast before dropping on diluted adhesive.
- Clean brushes promptly in water before acrylic sets in the ferrule, and reshape the point after each session.
Table of Contents
- Why Paint Unites Scenery, Structures and Track
- Painting Hills, Rock Faces and Ground with Layered Colour
- Fine Figure Painting, Ropes, Rocks and Water Effects
- Weathering Timber Yards, Machinery, Sheds and Ballast
- Using a 2.5cm Flat Brush for Terrain and Ballast
- Preparation, Acrylic Paints and Protecting Electrical Contacts
- Common Painting Mistakes to Avoid
- Building Colour Gradually on Your Layout
- Frequently Asked Questions
Why Paint Unites Scenery, Structures and Track
Painting miniature models is what turns a collection of separate models into one believable place.
The trick is not one perfect colour. It is the same handful of earthy tones carried across every surface. A dusty brown on a rock face should echo the brown on a shed wall and the grime on a timber wagon.
Below, we break down how we would paint each element of a layout, from broad hills down to a figure on a rock ledge, and where brushes and paints fit in.
Painting Hills, Rock Faces and Ground with Layered Colour
Start with subdued base colours, add darker washes in the recesses, then dry-brush lighter highlights over the top. Three thin layers beat one thick coat every time.
Base colours, washes and dry-brushed highlights
- Base: a flat earth or grey-brown over the whole area. Let it dry fully.
- Wash: thinned dark brown or grey worked into crevices and shadow lines.
- Dry-brush: a lighter tone flicked over raised edges with a nearly dry brush.
Avoid bright, uniform colour. A hill painted one shade of green looks like a painted hill. Several earthy shades, blended while wet, look like ground.
Fine Figure Painting, Ropes, Rocks and Water Effects
Painting miniature models well is where a layout either gains a sense of scale or loses it, especially with figures, ropes and water. A figure painted in flat, bright colours pulls the eye away from everything around it, while a figure in muted, layered tones sits naturally against the rock and foliage.
Work in thin coats and let each one dry before adding the next, as drying between layers helps keep detail sharp. If you flood a face or a rope coil with wet paint, the brush marks and the underlying detail disappear.
Choosing brushes: #0, #00 and #000
- #0: controlled general detail, straps, boots, tools, rope coils and the broader folds of clothing.
- #00: faces, clothing folds and small fittings such as buckles, harnesses and handrails.
- #000: the finest highlights and touch-ups on rock edges, foliage tips and the top of a rope.
If you are starting out, a fine detail paint brush set covering #0, #00 and #000 gives you all three sizes without guesswork. Keep the points clean and reshape them with your fingers or a brush soap after each session; a splayed #000 is no longer a #000.

Painting figures, ropes and rock edges
- Base coat: a subdued earth, grey or faded clothing colour over the whole figure. Let it dry fully.
- Wash: a thinned dark brown or grey worked into the folds, under the chin, between the legs and along the rope's twist. Let it settle rather than flood.
- Dry-brush: a lighter tone flicked over the raised edges, shoulders, knees, the top of a rope coil, the sharp edge of a rock. Use a nearly dry brush so the paint catches only the high spots.
- Touch-up: the #000 for the smallest highlights, such as the top of a buckle or the edge of a boot sole.
Keep paint out of any moving part on a figure or piece of machinery. A stiff joint is far harder to fix than a missed highlight, and paint in a hinge or a wheel bearing can stop a model rolling or a figure posing. If paint does get into a joint, clean it out while it is still wet rather than scraping it later.
Water effects and foliage edges
Water in the photograph is not a single blue. It is a dark base, a lighter streak where the flow catches the light, and a pale edge where it meets the rock.
Foliage edges benefit from the same restraint. Dry-brush a lighter green or brown over the tips of the foliage, then use the #000 to pick out a few individual leaves or stems at the edge where the foliage meets the rock.
Watch out: paint on a railhead or wheel-contact surface will stop a locomotive picking up power, and it is easy to miss until the model fails on the track.
Weathering Timber Yards, Machinery, Sheds and Ballast
Weathering works best when it is restrained. A log stack, a loading shed and the ground around it should share the same dust, grime and faded timber tones.
Apply a thin wash over the whole surface, let it settle into the grain and corners, then dry-brush a lighter tone back over the high spots. Repeat in small amounts rather than flooding one heavy colour.
- Logs: grey-brown base, dark wash in the bark grooves.
- Machinery: soot and oil near exhausts, dust on horizontal surfaces.
- Sheds: faded paint, rust streaks under rooflines.
- Ballast: a light dust wash, not a full repaint.
Using a 2.5cm Flat Brush for Terrain and Ballast
A 2.5cm flat brush is the workhorse for large terrain sections, broad blending and dry-brushing. It covers ground quickly and blends two colours before they dry.
A 25 mm flat brush pack is worth having in multiples. Keep one brush clean and dry for ballast work.
After laying loose ballast, that dry flat brush can gently sweep and shape the stones between and beside the sleepers. Work away from the points and keep stones clear of the inner rail faces before you drop on diluted adhesive.
Preparation, Acrylic Paints and Protecting Electrical Contacts
Preparation decides how the paint behaves, and it is the step most often rushed. A surface that is dusty, greasy or glossy will reject paint, and a surface that is painted without masking will cause electrical faults that are hard to trace later. Work through the following before any colour goes on.
Preparing the surface
- Clean: wash plastic and metal parts with a mild detergent and water, then let them dry completely. Fingerprints and mould-release agents stop paint adhering.
- Prime where needed: bare plastic, resin and metal usually need a primer to give the acrylic a key. Test the primer on scrap first, and check that it is compatible with the paint you intend to use.
- Test the colour: paint a small scrap of the same material and let it dry. Acrylics dry slightly darker or lighter than they look wet, and a colour that looks right in the bottle can look wrong on the model.
- Mask electrical surfaces: railheads, wheel-contact surfaces, decoder or wiring connections and any socket or plug should be masked before painting or weathering nearby. Use masking tape or a small piece of plastic sheet, and remove it before the paint fully hardens so it does not tear the edge.
Thinning and applying acrylics
Acrylics thin with water or the maker's thinner. Add thinner a little at a time and mix thoroughly; a consistency like milk is usually right for a thin coat. Apply thin coats and let each one dry before the next. A thick coat will obscure detail, dry unevenly and can soften fine mouldings.
Clean brushes promptly in water before paint sets in the ferrule. Once acrylic dries in the base of the bristles, the brush loses its shape and its point. A brush soap or a mild soap and water is enough for most acrylics; check the maker's instructions for any specific cleaner.
Protecting railheads, wheels and electrical connections
Paint on a railhead kills pickup, and paint in a socket causes faults that are hard to trace. Mask railheads, wheel-contact surfaces and decoder or wiring connections before painting or weathering nearby, and check them again after the session.
Watch out: paint on a railhead or wheel-contact surface will stop a locomotive picking up power, and it is easy to miss until the model fails on the track.
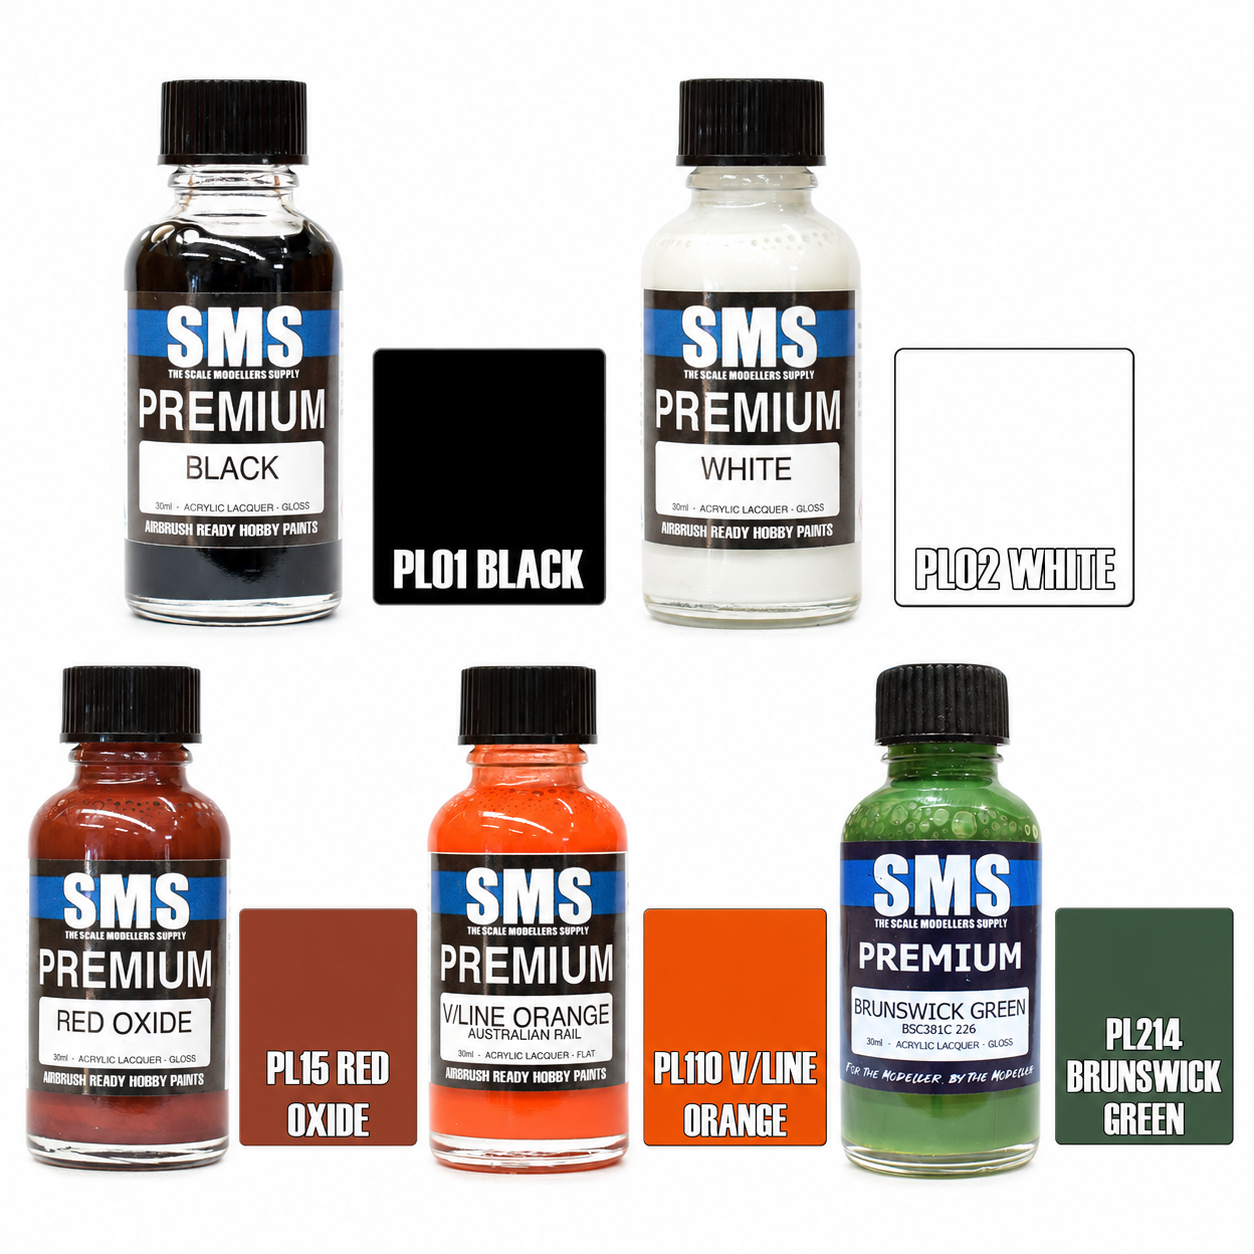
For model painting, the SMS Premium Acrylic Lacquer range and our paints and brushes collection cover most layout work. Check the maker's instructions for thinning, surface compatibility and safety, and test on scrap before committing to a model.
Common Painting Mistakes to Avoid
The same handful of errors show up again and again:
- One thick coat instead of several thin ones.
- Bright, uniform colour with no variation.
- Painting over railheads or electrical contacts.
- Skipping the wash, so recesses stay flat.
- Rushing dry-brushing with a wet brush.
Watch out: paint on a railhead or wheel-contact surface will stop a locomotive picking up power, and it is easy to miss until the model fails on the track.
The same handful of errors show up again and again, and each one has a straightforward fix.
Problem |
Cause |
Fix |
|---|---|---|
Detail lost under paint |
One thick coat instead of several thin ones |
Apply thin coats and let each dry |
Hill looks like a painted hill |
Bright, uniform colour with no variation |
Blend several earthy shades while wet |
Locomotive fails on the track |
Paint on railheads or electrical contacts |
Mask railheads and wheel contacts before painting |
Recesses stay flat |
Skipping the wash |
Work a thinned dark wash into crevices |
Paint catches everywhere |
Rushing dry-brushing with a wet brush |
Use a nearly dry brush for highlights |
Building Colour Gradually on Your Layout
Build colour in stages, and stop while it still looks subtle. A layout painted over several sessions almost always reads better than one finished in a single afternoon.
For layered ground colour, our helpsheet on making your own coloured scatter is a useful next step once your base coats are down.

Painting a layout is a skill you build one thin layer at a time, and the right brushes and paints make it far less frustrating.
A note from HobbyTrax: This article reflects our practical modelling experience and information available at the time of writing. Products, specifications and technology can change, so check current manufacturer instructions and compatibility before starting a project.
Frequently Asked Questions
How do I choose the right brushes for painting miniature models?
Match the brush to the area. Use a 2.5cm flat brush for terrain, broad blending and dry-brushing; keep a second clean, dry brush for shaping loose ballast. Use #0 for controlled detail, #00 for faces and fittings, and #000 for the finest highlights. Clean each brush promptly with the cleaner recommended for the paint type, then reshape its point.
Should I use bright colours when painting miniature models and scenery?
Avoid bright, uniform colours across large areas. Several earthy shades create depth, so start with subdued base colours, apply darker washes in recesses, then dry-brush highlights on raised surfaces. Build colour in thin layers rather than one heavy coat, and test shades on scrap material before committing to the layout. Restrained grime and fading usually look more convincing than a single strong colour.
How do I protect railheads and electrical connections while painting?
Mask or wipe railheads, wheel-contact surfaces and electrical connections before paint or diluted adhesive sets. Keep ballast stones away from the inner rail faces and avoid points when sweeping loose ballast into place. Check that paint has not bridged any moving parts, then test-run locomotives and check function outputs before permanent fitting. Isolate power while working on wiring or electrical components.
What preparation is needed before painting scenery and structures?
Clean and dry the surface, remove dust and grease, and test the paint on scrap material first. Check whether the product is a water-based acrylic or an acrylic lacquer: they use different thinners and cleaners. SMS Premium Acrylic Lacquer is not water-thinned, so follow the manufacturer's instructions, work with suitable ventilation and protect railheads, electrical contacts and moving parts.
