

Last Updated: October 30, 2026
Quick Summary
Choosing baseboard materials comes down to matching the board to your layout's size, weight and storage. Plywood suits most builds, MDF works in stable dry rooms, and solid timber belongs in the frame rather than the top. A 9mm sealed plywood top on a braced pine frame is a sensible first build.
- Sketch your track plan at full size before buying any timber.
- Use 9mm plywood at 400-600mm bracing centres for HO and OO layouts.
- For many HO and OO layouts, 9 mm plywood with bracing at approximately 300–450 mm centres provides a practical starting point. Wider spacing may require thicker or higher-grade plywood.
- Seal every face and cut edge equally to prevent cupping and warping.
- Treat fibreboard and foam as scenic layers over a structural top, never as the baseboard.
Table of Contents
- Start With the Layout, Then Choose the Board
- What Is the Best Wood for a Model Railway Baseboard?
- Plywood vs MDF Model Railway Baseboard: Side-by-Side
- Building the Frame: Bracing, Support Spacing and Fixings
- Lightweight Model Railway Baseboard Options for Portable Layouts
- Preventing Model Railway Baseboard Warping and Sagging
- Cutting, Sealing and Finishing Your Board Safely
- Planning Your Baseboard Build With HobbyTrax
- Frequently Asked Questions
Start With the Layout, Then Choose the Board
Selecting the right baseboard materials for model trains starts long before you pick up a saw. The board has to carry your track plan, hold scenery, survive the climate it lives in and stay flat for years; and often your weight! Beginners often buy timber before planning, and that order can cost them.
Begin with the layout itself:
- Size and reach: can you reach every point without leaning across scenery?
- Portability: does it stay put or get folded away?
- Scale: HO and OO layouts carry more weight than N or TT 120.
- Room conditions: garages and sheds swing in humidity and heat swings far more than a spare room.
Sketch the plan at full size before buying anything. If you would rather work it out on screen, our guide to train layout software walks through the options.
What Is the Best Wood for a Model Railway Baseboard?
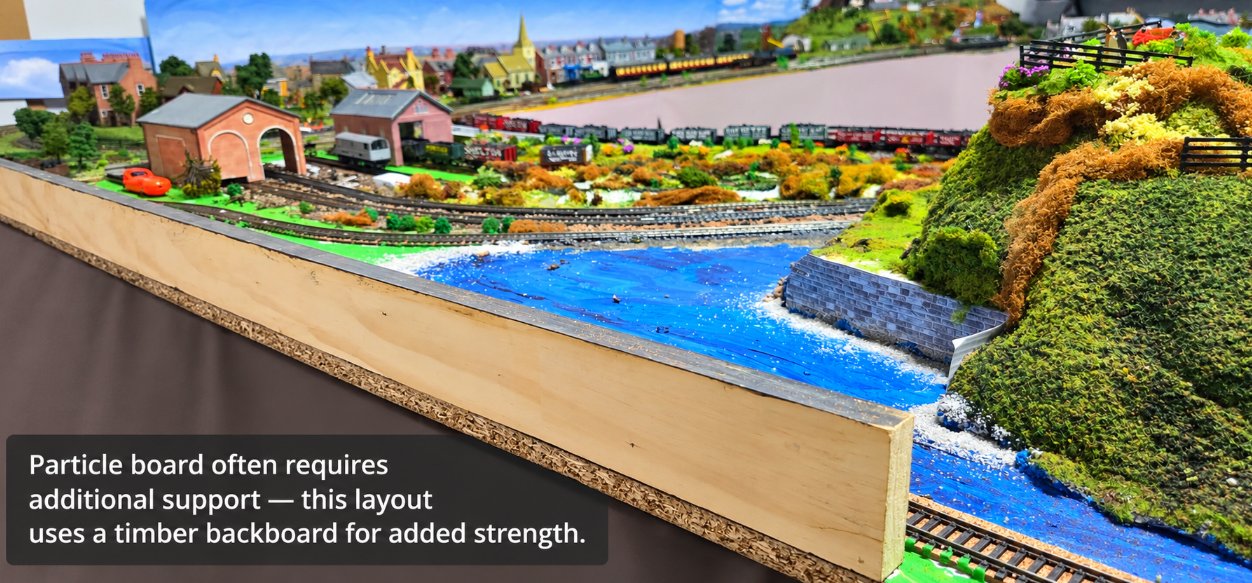
There is no single best wood. The honest answer is that the best wood for a model railway baseboard is the one that matches your layout's size, weight, storage and availability. Plywood suits most builds. We still at the shop grab anything that’s going and make it work. We got hold opf a heap of 19mm thick structural particleboard that is more commonly used in Australian residential construction. That works great, but is very heavy.
Model railway forums show how split this gets. One discussion on baseboard material choices saw a hobbyist back a pine frame with a plywood top, while another preferred MDF over plywood supports. Neither ran a controlled test.
A common rule of thumb for hobbyists: plywood for the top, pine for the frame, and bracing everywhere.
Plywood vs MDF Model Railway Baseboard: Side-by-Side
Plywood wins on strength-to-weight and screw holding. MDF wins on a flat, uniform surface and easy cutting. Fibreboard is light but soft. Solid timber belongs in the frame, not the top. Here is how the plywood vs MDF model railway baseboard question really breaks down:
Material |
Weight, Strength and stiffness |
Moisture behaviour |
Workability |
Best for |
|---|---|---|---|---|
Plywood (crossed veneers) 6, 9, 12mm |
Light to medium High; resists warping |
Good when sealed on all faces |
Holds track pins and screws well; edges need sealing |
Most layouts; portable and permanent |
Particle board/chipboard 12 to 18 mm |
Heavy Moderate but weak at edges; screw holding can deteriorate |
Swells and can crumble if moisture reaches unsealed areas |
Easy to cut but creates dust and chips; edges need care |
Small, permanent layouts in consistently dry rooms; generally not preferred for portable baseboards |
MDF 6, 9, 12mm |
Medium to heavy Moderate; flat but brittle at edges |
Poor; swells and does not recover |
Cuts and sands easily; fine dust |
Small, dry-room layouts and flat scenic boards |
Fibreboard 9, 12mm |
Light Low; dents and sags under load |
Poor |
Very easy to pin; soft |
Lightweight scenic tops only, fully supported |
Solid timber (pine) 19-45mm section |
Medium High along the grain |
Moves with humidity; needs sealing |
Saws and screws well |
Frame rails and bracing, not tops |
Extruded polystyrene foam 25-50mm |
Very light Low on its own; needs a sub-base |
Unaffected by humidity |
Cuts with a knife or hot wire |
Raised scenery over a structural top |
Reading the table in practice:
- Plywood grade matters. For a top, look for a sheet with a reasonably smooth face veneer and no large voids in the core. Interior-grade plywood is fine in a dry room once sealed; if the layout lives in a shed or garage, ask for a moisture-resistant grade and seal every face and edge.
- Thickness follows span, not habit. A 6mm top is fine only when bracing is close, think 300mm or less between supports. At 400-600mm bracing centres, 9mm is the sensible minimum for HO and OO. For a large permanent board with wide unsupported spans, 12mm removes the doubt.
- MDF is flat, not stable. It cuts cleanly and takes paint well, but any damp reaching an unsealed edge causes swelling that will not shrink back. Use it where the room is dry and the board is fully sealed, and never rely on it in a garage.
- Fibreboard is a scenic surface, not a structure. It pins easily and deadens sound, but it dents and sags. Treat it as a thin top over a braced plywood sub-base, not as the structural board.
- Foam is scenery, not baseboard. Extruded polystyrene is excellent for embankments, cuttings and raised track beds, but it has almost no stiffness on its own and must sit on a structural top.
A common mistake is going too thin to save weight. A 6mm top on a wide board with sparse bracing will sag under scenery and track within a season. A 9mm plywood top, braced underneath with a pine frame, is a sensible choice for a first build.
Building the Frame: Bracing, Support Spacing and Fixings
Build the frame first, because the frame decides whether the top stays flat. A straightforward approach many modellers use is a pine frame with a plywood top, and it holds up well when braced properly.
Work through it in order:
- Cut the frame rails from pine, sized to your plan.
- Assemble frame rails with PVA glue and panel pins, checking square at every corner.
- Add cross braces every 400-600mm so the top cannot flex. This depends on the top's thickness.
- Fix the top down with glue and screws, not pins alone.
- Check for twist before the glue sets.
Keep bracing close enough that you cannot push the top down with a thumb. If you can, add another brace.
Lightweight Model Railway Baseboard Options for Portable Layouts
Portable layouts need a different balance: light enough to lift, stiff enough to survive the car trip. A lightweight model railway baseboard usually means thinner plywood, a deeper braced frame and fewer heavy fittings.
Options worth considering:
- 6mm or 9mm plywood top with closely spaced bracing
- Folding frames joined with hinges, so two boards close like a suitcase
-
Polystyrene scenery instead of solid plaster, which reduces weight
Baseboard kits if you want pre-cut timber without the saw work
Watch out: lightness and stiffness pull against each other. A board that flexes in transit will crack scenery and shift track. Brace more than you think you need.
Preventing Model Railway Baseboard Warping and Sagging
Preventing model railway baseboard warping comes down to three things: sealing, bracing and keeping moisture out. Timber moves with humidity, and an unsealed board in a shed will cup and twist.
Seal every face, including the underside and cut edges. Paint or varnish both sides equally so moisture enters and leaves at the same rate. Then support the board along its length, not just at the corners.
A few habits that save boards:
- Store boards flat, never leaning against a wall.
- Keep sheds and garages ventilated.
- Use plywood rather than fibreboard where damp is likely.
- Check for twist with a straightedge before laying track.
If a board has already sagged, adding a brace underneath is usually cheaper than replacing it.
Cutting, Sealing and Finishing Your Board Safely
Cutting and sealing is where a good board is either protected or ruined. The two risks are dust and moisture: dust affects you, moisture affects the board. Handle both before the first piece of track goes down.
Cutting sheet materials
- Support the sheet both sides of the cut. A sheet that drops as the cut finishes will splinter the face veneer and can kick back. Use trestles or a sacrificial sheet underneath.
- Clamp the sheet down so it cannot shift, and keep your hands clear of the cut line.
- Score the face veneer first with a sharp knife along the cut line, then saw. This reduces tear-out on plywood.
- Use the right blade. A fine-tooth saw or a circular saw with a sharp, appropriate blade gives a cleaner edge than a coarse hand saw. Let the tool do the work rather than forcing it.
- Cut MDF outside or with extraction. MDF dust is very fine and irritates lungs and eyes. Wear a suitable dust mask and eye protection, ventilate the workspace and use dust extraction where you can. Plywood dust is coarser but still worth controlling.
Sealing edges and faces
Cut edges of plywood and MDF are the most vulnerable points because they expose end grain or raw fibre. Seal them before assembly:
- Sand the cut edge smooth.
- Apply a sealer, a suitable timber sealer, diluted PVA or a primer, to the edge and let it dry.
- Seal both faces equally, including the underside, so moisture enters and leaves at the same rate.
- Re-coat cut edges after any later trimming.
Sealing both sides equally is the single most effective defence against cupping. A board sealed on top only will take up moisture from below and bow.
Finishing sequence
- Cut and dry-fit the frame and top first.
- Seal edges and faces, then let everything dry fully.
- Assemble the frame, check for square and twist, then fix the top.
- Only then lay track and scenery.
Solvent-based adhesives and paints can damage some types of foam.
If you are starting out and unsure what to buy, our guide to model railway tools for beginners covers the basics without overspending.
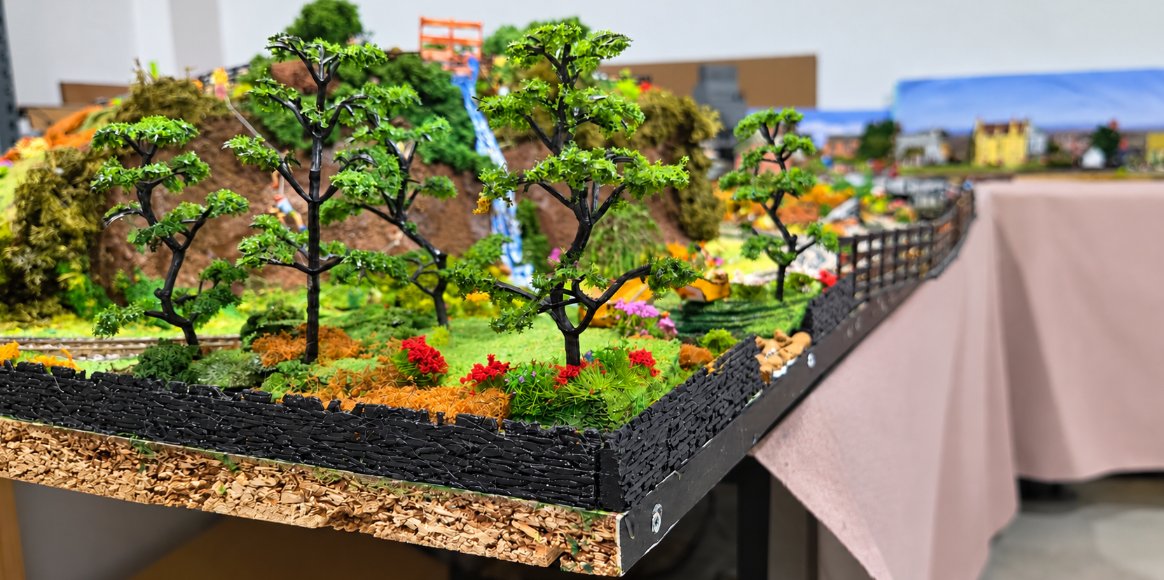
This model railway was built on the particle-board back from an old wardrobe—proof that suitable recycled materials can be given a second life with the right support.
Planning Your Baseboard Build With HobbyTrax
A good board is the foundation everything else sits on: track, wiring, scenery and lighting. Get the baseboard materials right and the rest of the build goes smoothly.
HobbyTrax supplies model railway parts and accessories, including track, wiring, scenery and tools. You can read more about what HobbyTrax offers before you start.
A note from HobbyTrax: This article reflects our practical modelling experience and information available at the time of writing. Products, specifications and technology can change, so check current manufacturer instructions and compatibility before starting a project.
Frequently Asked Questions
How thick should plywood be for a model railway baseboard?
For most HO and OO layouts, 9 mm plywood over a braced timber frame is a practical starting point, and it is the thickness most often recommended in hobby discussions. Thinner 6 mm board can work on small portable sections where weight matters, provided bracing is close enough to stop flex. Thicker board adds weight and stiffness but costs more and is harder to cut cleanly. Match the thickness to your span between supports rather than picking one figure for every layout.
Is plywood or MDF better for a model train baseboard?
Both appear in working layouts, and each has trade-offs. Plywood holds screws and pins better and copes with moisture more predictably, which suits layouts in garages or sheds. MDF gives a flat, uniform surface and cuts cleanly, but it is heavier, dislikes damp and produces fine dust when cut, so wear a mask and work in ventilated space.
How do you stop a model railway baseboard from warping?
Warping usually comes from moisture imbalance and unsupported spans. Seal all faces and edges of the board, including the underside, with a suitable primer or sealer so it absorbs moisture evenly. Store boards flat and off concrete floors, keep the layout away from damp walls, and brace the frame at regular centres so the panel cannot bow. Acclimatise timber in the room where the layout will live before cutting and assembling it.
Do model railway baseboards need a frame?
A frame does most of the structural work. It keeps the top panel flat, carries the weight, and gives you something solid to mount legs, backscenes and point motors to. Even a lightweight baseboard benefits from a braced frame, because the panel alone will flex under track and scenery. A common approach is a timber frame with cross bracing and a plywood top, rather than relying on a single thick sheet.
Building a baseboard is the step most beginners rush, and it is the one that decides how the next ten years of your layout hold up. Start with the plan, choose plywood for the top, brace the frame properly, and seal every face. Get started with HobbyTrax and build a base that keeps your track flat and your scenery steady.
